


How to Cook Eggs in Stainless Steel (Without the Stick)
Fried, scrambled, folded, and French omelets in stainless steel, plus why eggs stick and how to stop it.
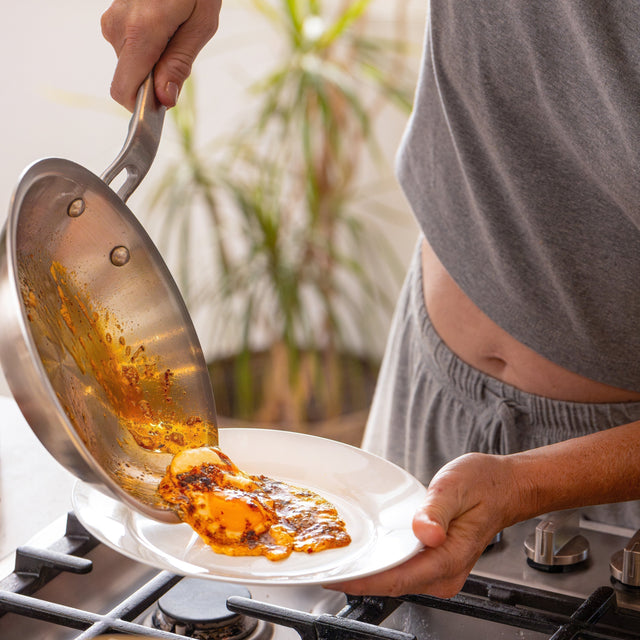
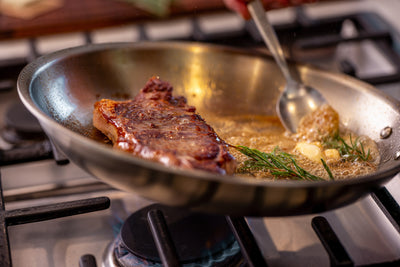
 Fig. 01 · A fried egg cooking in a Heritage Steel fry pan
Eggs stick to stainless steel for one reason: the pan wasn't ready when the egg went in. Fix the heat and the fat, and a fully-clad stainless pan will cook eggs as cleanly as anything with a coating on it, and keep doing it for decades.
Eggs are the test most people fail first with stainless. One stuck, shredded breakfast and the pan goes to the back of the cabinet. That's a shame, because stainless gives you things nonstick can't: real browning, crisp lacy edges, a pan you can run under the broiler, and a cooking surface with no coating to scratch, flake, or wear out.
This guide walks through fried eggs, scrambled eggs (small curd and large curd), the classic folded omelet, and the French omelet. The fried and scrambled egg sections include short videos from our kitchen so you can see exactly what the pan, the fat, and the eggs should look like at each step.
Why eggs stick to stainless steel
The setup: get the pan ready
Fried eggs
Scrambled eggs: small curd vs. large curd
Omelets: the classic fold and the French roll
Common mistakes
Helpful hints
Why eggs stick to stainless steel
Eggs stick because their proteins bond to the metal before they've had a chance to set. Egg whites are mostly water and protein. Drop them on cold or under-heated steel and those proteins grab onto the surface as they cook, and they don't let go.
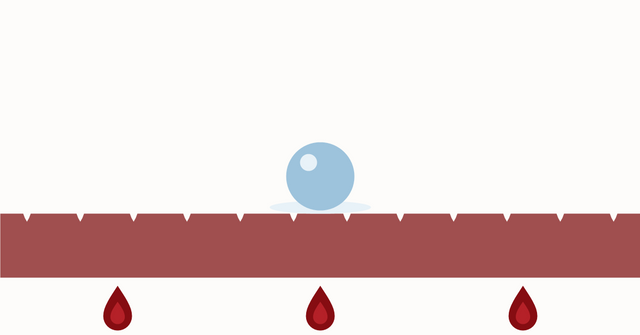
Stainless steel looks smooth, but up close it's full of tiny pores and ridges. When the pan heats, the metal expands and those pores tighten up. A properly preheated pan gives the egg a tighter surface to land on, and a hot layer of fat between the two keeps them apart.
There's also a little physics working in your favor. Once a stainless pan gets hot enough, water hitting the surface turns to steam so fast that it lifts the droplet off the metal. That's called the Leidenfrost effect, and it's why a drop of water will bead up and skate across a hot pan instead of sizzling and spreading. The egg's moisture does the same thing on a small scale, helping it release.
Why fully-clad construction matters
The other half of the problem is uneven heat. A thin pan, or one with a heavy disc bonded only to the bottom, develops hot spots. One side of your egg scorches and glues itself down while the other side is still runny.
Every Heritage Steel pan is 5-ply, fully clad: layers of conductive metal bonded together and wrapped in stainless, from the center of the base all the way up the sidewalls. Heat spreads evenly across the whole cooking surface and holds steady when cold food hits it. For eggs, that steadiness is most of the battle.
The setup: get the pan ready before the eggs
Every egg method in this guide starts the same way. Get this part right and the rest is technique.
- Start with a clean, dry pan. Leftover residue or water spots give eggs something to grab.
- Preheat on medium-low for 1.5 to 3 minutes. Not high. Heating slowly lets the whole pan, edges included, come up to temperature evenly. Fully-clad steel holds heat well, so you don't need to blast it, and a pan that's too hot will scorch butter and brown eggs before they set.
- Add your fat and let it tell you the temperature. About a teaspoon of butter or oil for a pair of eggs. Butter should melt and foam gently within a few seconds; oil should shimmer. If butter browns or smokes right away, the pan is too hot.
- Turn the heat down. For most egg methods, drop to medium-low or low right after the fat goes in. The pan is hot enough to release the egg; now you want gentle heat to cook it.
- Bring your eggs closer to room temperature. Cold eggs straight from the fridge drop the pan temperature fast. Ten minutes on the counter helps, or set them in a bowl of warm water for a few minutes.
You don't need the water droplet test for eggs. Drops that bead up and skate across the pan mean searing heat, more than most eggs want. It's worth doing for a fast scramble or crispy-edged fried eggs; for everything else, let the butter be your gauge.
That sequence, hot pan, fat, then lower heat, is what customers who've mastered it describe over and over. One reviewer put it simply: preheat, add butter, turn it to low, and the eggs slid around the pan like glass.
Butter or oil?
Both work. Butter tastes better and gives you a built-in temperature gauge: when it foams and the foam starts to settle, you're in the right range. When it browns fast or smokes, the pan is too hot. Oil handles higher heat, so reach for it when you want crispy-edged fried eggs. Or use both. A little oil in the butter raises its smoke point, so you get more room for error and still keep the butter flavor.
Which pan to use
| Pan | Best for |
|---|---|
| 8.5" Fry Pan | One or two fried eggs, a French omelet for one |
| 10.5" Fry Pan | Scrambled eggs for two to four, a 3-egg folded omelet |
| 12" Fry Pan | Four or more fried eggs at once, family-size scrambles |
Use a silicone or wooden spatula for scrambles and omelets. For fried eggs, use a thin metal spatula or fish spatula. Thicker silicone, plastic, and wooden turners tend to catch the egg and tear it. A thin metal edge slides right under, and stainless can take it.
Fried eggs
The fried egg is the one everyone's afraid of, and the one that teaches you the most. The single rule:
Once the egg is in the pan, leave it alone until it lets go.
Sunny side up
- Preheat, then add enough butter or oil to coat the whole bottom of the pan.
- Drop the heat to medium-low. Crack the egg into a small bowl first, then slide it into the pan. That keeps the yolk intact and lets the egg land gently.
- Don't touch it. For the first 30 to 60 seconds the white is bonding and then releasing. If you push it early, it tears.
- When the white turns opaque at the edges, give the pan a gentle shake or nudge the egg with a thin metal spatula. A released egg will slide. If it doesn't, wait another 20 seconds.
- To set the top of the white without flipping, cover the pan with a lid for 30 to 60 seconds, or spoon a little of the hot fat over the white.
Over easy, over medium, over hard
Start exactly like sunny side up. Once the egg slides freely when you shake the pan, get a thin spatula fully under it and flip in one motion.
| Style | Time after the flip | Yolk |
|---|---|---|
| Over easy | 15 to 30 seconds | Runny |
| Over medium | About 1 minute | Jammy, partly set |
| Over hard | 2 minutes or more | Fully set |
If the egg doesn't slide when you're ready to flip, it isn't ready. Forcing the spatula under a stuck egg is how yolks break.

Crispy-edged fried eggs
This is where stainless shines. Use oil instead of butter, a little more of it (a tablespoon), and keep the heat at medium instead of turning it down. The edges of the white will bubble, puff, and turn brown and lacy. Tilt the pan and baste the top with the hot oil to finish. A coated pan can't safely take that kind of heat; a Heritage Steel pan is built for it.
Scrambled eggs: small curd vs. large curd
Scrambled eggs are easier in stainless than fried eggs, because the eggs are always moving. The difference between small curd and large curd comes down to two things: how hot the pan is and how often you stir.
For either style, whisk the eggs well before they hit the pan, until no streaks of white remain.
| Small curd | Large curd | |
|---|---|---|
| Texture | Soft, creamy, almost custard-like | Fluffy, pillowy folds |
| Heat | Low | Medium-low |
| Stirring | Constant, small circles | Slow, occasional pushes |
| Time (4 eggs) | 5 to 8 minutes | 2 to 3 minutes |
| Best tool | Silicone spatula or wooden spoon | Wide silicone spatula |
Small curd
- Preheat, then add a tablespoon of butter and drop the heat to low.
- Pour in the eggs once the butter has melted but before it browns.
- Stir constantly in small circles and figure-eights, scraping the bottom and sides as you go. You're breaking the curds as soon as they form.
- Pull the pan off the burner every so often if the eggs start setting too fast. Slow is the point.
- Take them off the heat while they still look a little wet. They'll keep cooking on the plate. A small knob of cold butter or a spoon of crème fraîche stirred in at the end makes them richer.
Large curd
- Preheat, add butter, and set the heat to medium-low.
- Pour in the eggs and let them sit, untouched, for 10 to 15 seconds until the edges begin to set.
- With a wide spatula, push the eggs from the edge toward the center in long, slow strokes. Tilt the pan so the raw egg runs into the open space.
- Repeat every few seconds. You'll see big, soft folds form.
- Stop when there's just a little glossy, uncooked egg left, and plate right away.
If you're getting a thin film stuck to the bottom of the pan, the heat is too high or the eggs are sitting too long between stirs. Turn it down and keep them moving.
Omelets: the classic fold and the French roll
An American-style omelet is cooked until set, lightly golden, and folded over a filling. A French omelet is pale, smooth, and soft in the middle, rolled into a tight cylinder. Both come out clean in stainless if you respect the heat.
The classic folded omelet
- Have your fillings cooked, warm, and ready before you start. Cheese grated, vegetables sautéed, ham diced. An omelet cooks in about two minutes, and there's no time to prep mid-way.
- Whisk 3 eggs with a pinch of salt. Preheat a 10.5" fry pan, add a tablespoon of butter, and set the heat to medium-low.
- Pour in the eggs and let them sit for about 20 seconds.
- Using a spatula, lift the set edge and tilt the pan so raw egg flows underneath. Work your way around the pan.
- When the top is mostly set but still a little glossy, shake the pan to confirm the omelet slides freely.
- Add your fillings to one half. Fold the other half over, let it sit 20 to 30 seconds so the cheese melts, and slide it onto the plate.
The French omelet
The French omelet is the one cooks use to prove they know their way around a pan. It's fast, it's all wrist, and stainless handles it well once your heat is dialed in.
- Whisk 3 eggs very thoroughly with a pinch of salt. You want them completely smooth, with no visible white.
- Preheat an 8.5" fry pan and add a tablespoon of butter. Keep the heat at medium-low. The butter should foam but never brown. Brown butter means brown omelet.
- Pour in the eggs. Immediately start shaking the pan back and forth with one hand while stirring quickly in small circles with a spatula or the back of a fork in the other. This makes tiny, creamy curds.
- After 20 to 30 seconds, when the eggs look like loose, wet scrambled eggs, stop stirring. Spread them into an even layer and let them sit for 10 seconds to set the outside.
- Tilt the pan away from you. Using the spatula, roll the near edge of the omelet toward the far edge, about a third of the way.
- Tap the handle to nudge the omelet toward the lip of the pan, then tip it onto the plate so it rolls seam-side down.
- Rub the top with a little butter for shine. The outside should be smooth and pale yellow; the inside should be just barely set.
Your first French omelet may not look like a picture. That's normal. Make a few on a Saturday morning and the motion clicks.
Common mistakes
Almost every stuck egg traces back to one of these. We see them in customer reviews all the time, usually from someone in their first week with stainless.
| Mistake | What happens | The fix |
|---|---|---|
| Pan not preheated | Eggs bond to the steel before they set | Preheat 1.5 to 3 minutes on medium-low, until butter foams on contact |
| Pan way too hot | Butter smokes instantly, eggs brown and weld to the surface | Medium-low heat is enough; drop to low once the fat goes in |
| Heat left high after preheating | Bottom scorches before the top cooks | Turn the burner down as soon as the eggs go in |
| No fat, or too little | Nothing separates the egg from the metal | At least a teaspoon of butter or oil per two eggs |
| Moving the egg too early | White tears and leaves a layer behind | Wait for the egg to release on its own, then shake to check |
| Eggs straight from the fridge | Pan temperature drops, sticking starts | Let eggs sit out 10 minutes or warm them in water |
| Crowding the pan | Temperature crashes, eggs steam and stick | Use a larger pan or cook in batches |
| Water or residue left in the pan | Gives the egg something to grab | Start with a clean, completely dry pan |
The two that come up most are opposite problems: not enough heat, and far too much. One customer gave the pan a few extra minutes on a high gas flame before their first egg, and the butter smoked the second it hit the pan. The pan wasn't the problem. The temperature was.
Helpful hints
- Let the egg tell you when it's ready. A stuck egg that's left alone will often release by itself as it cooks. Patience fixes more sticking than any trick.
- Watch the butter. Gentle foam means you're in range. Fast browning or smoke means pull the pan off the heat for a moment.
- Learn your burner. Gas, electric, glass-top, and induction all heat differently. Make a note of the dial setting that gets butter foaming gently after a couple of minutes and start there every time.
- Use a lid for set whites. Thirty seconds under a lid cooks the top of a fried egg without flipping and without overcooking the bottom.
- Cook a lot of eggs at once in a bigger pan. A 12" fry pan holds four eggs with room to flip. Crowding a small pan cools it down.
- Keep a pan for eggs if you like. Plenty of our customers keep their 8.5" fry pan as the dedicated breakfast pan. It isn't necessary, but it's handy.
- Give it a week. Most people who switch from nonstick say the learning curve was shorter than they expected. A few mornings of practice and it becomes automatic.
Cleaning up after eggs
Let the pan cool a few minutes, then wash with warm soapy water and a sponge. For anything stuck on, our go-to is a stainless steel coil scrubber. If a film of egg is stuck on, add a little water to the warm pan and let it soak for a few minutes; it will lift right off. For white cloudy spots or rainbow discoloration from heat, a stainless cleanser like Bar Keepers Friend brings the finish back. Dry the pan completely before putting it away so it's ready for tomorrow.
For more on technique and care, see our stainless cooking handbook.
A pan worth learning
Eggs are where most people decide whether stainless is for them. Get the heat right once and you'll understand why so many cooks never go back to coated pans: nothing to wear out, nothing to flake off, and a pan that cooks the same in twenty years as it does today.
Every Heritage Steel pan is made in Clarksville, Tennessee, by a family that has been making cookware since 1982, and every one is backed by a lifetime warranty. If you're just getting started, the 10.5" Fry Pan is the everyday pan most of our customers reach for first, and the 8.5" Fry Pan is made for eggs for one.